Deploying SMB Over QUIC
Step 1: Deploy VM Windows Server 2022 Datacenter: Azure Edition
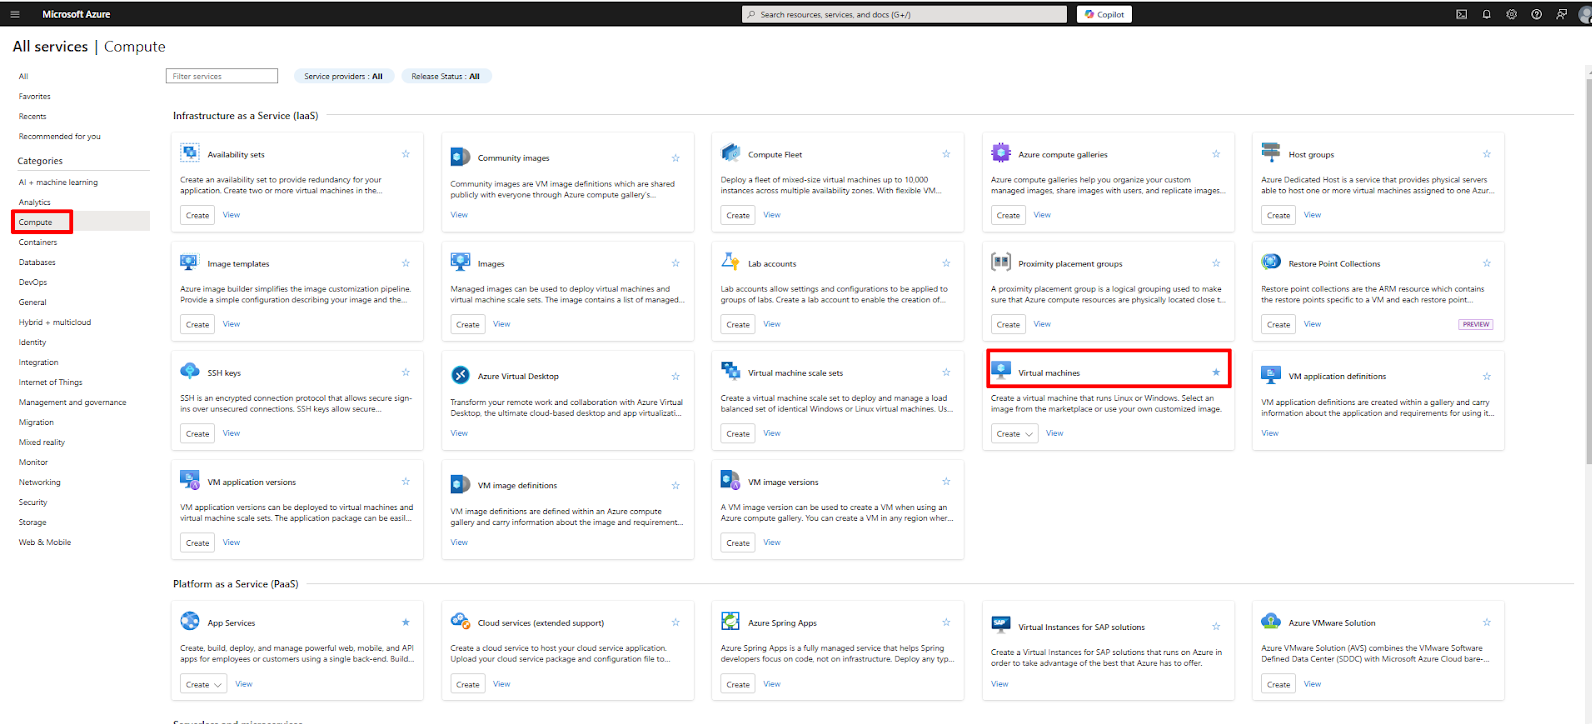
- Login to the Azure Portal, go to the Azure Service “Virtual Machines.”
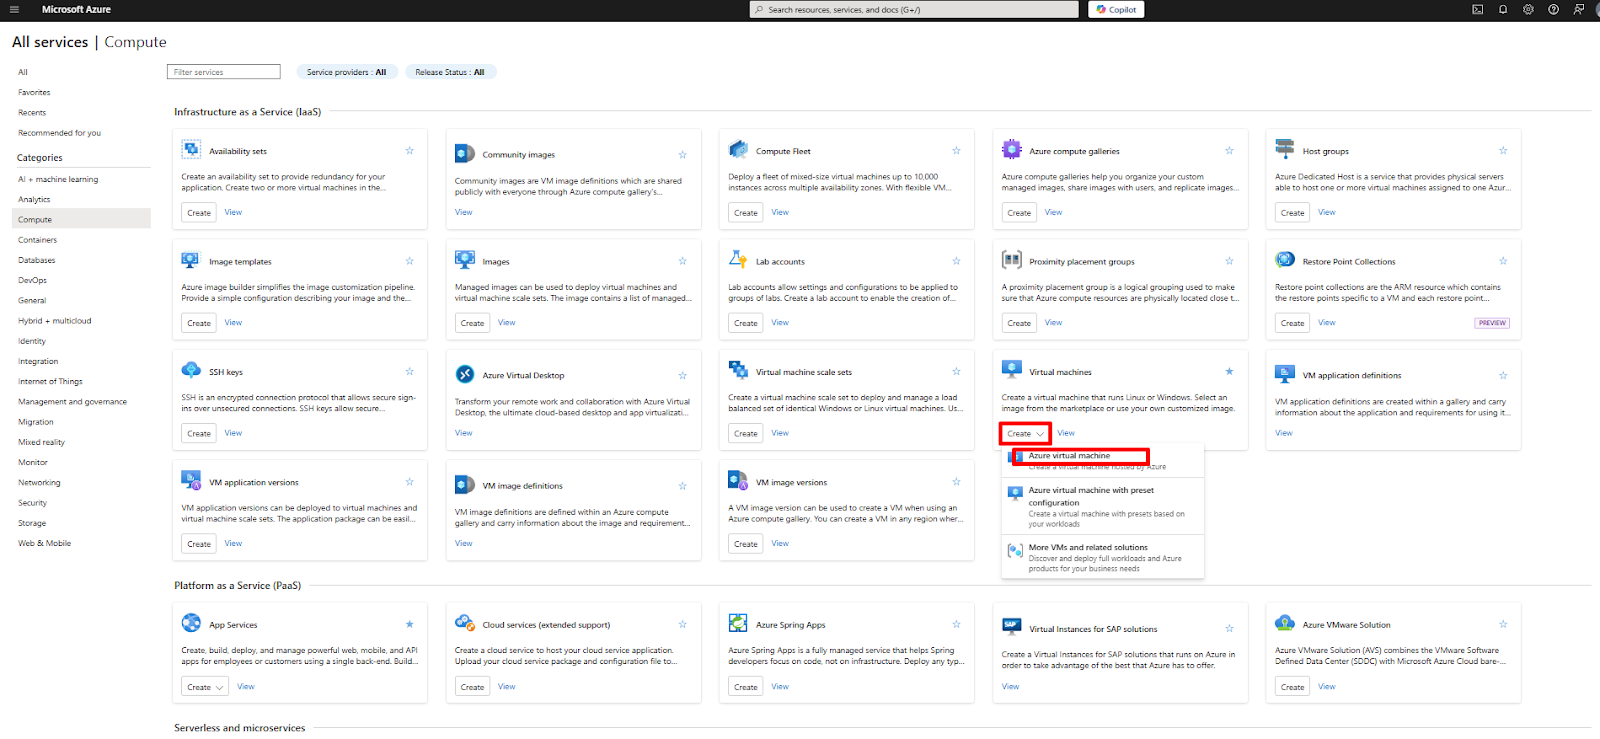
- Click on “Create” -> “Azure Virtual Machine.”
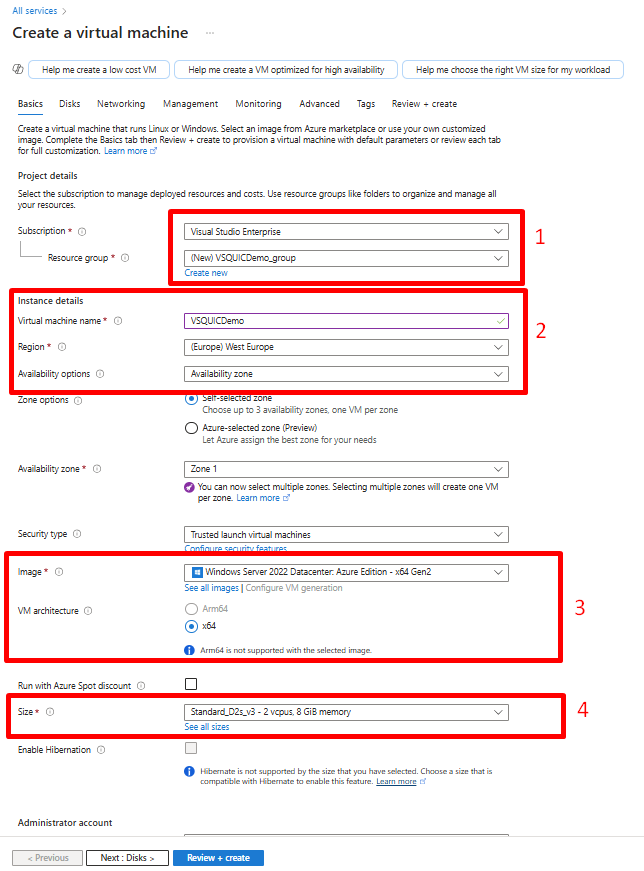
- Configure Azure Virtual Machine:
- Select Subscription and Resource group.
- Enter Virtual Machine name and select Region.
- Select Image Windows Server 2022 Datacenter: Azure Edition.
- Virtual Machine resources according to your own needs.
- Type in local credentials.
6. Proceed with the instructions given by “Create a virtual machine” wizard till completion.
7. After pressing Review + Create it will take a couple of minutes to deploy the VM.
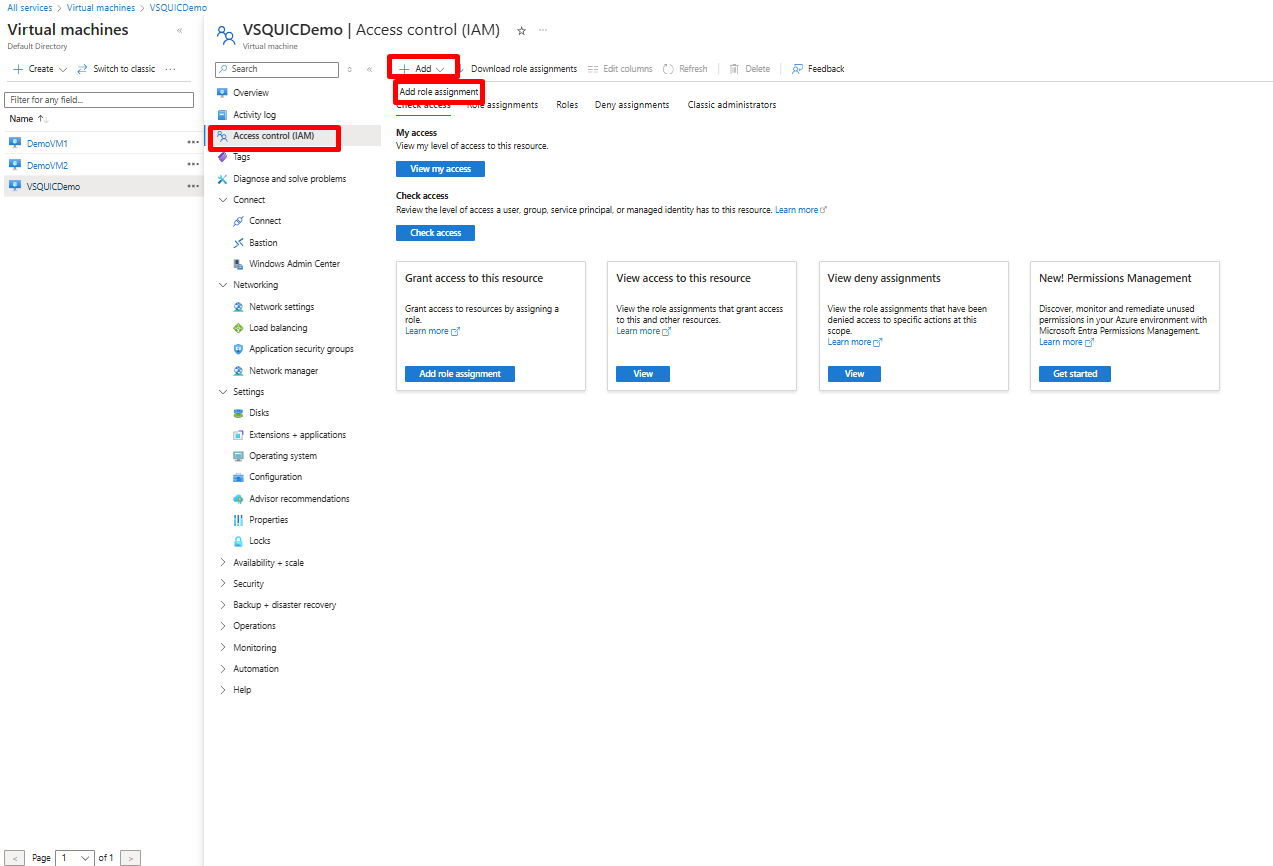
Step 2: Configure Windows Admin Center (WAC)
In order to access WAC, users must have the Azure role “Windows Admin Center Administrator Login” role.
- Open Access control (IAM) and click on Add > Add role assignment.
- Select role Windows Admin Center Administrator Login and click Next.
- Add authorized accounts to the role and click Next.
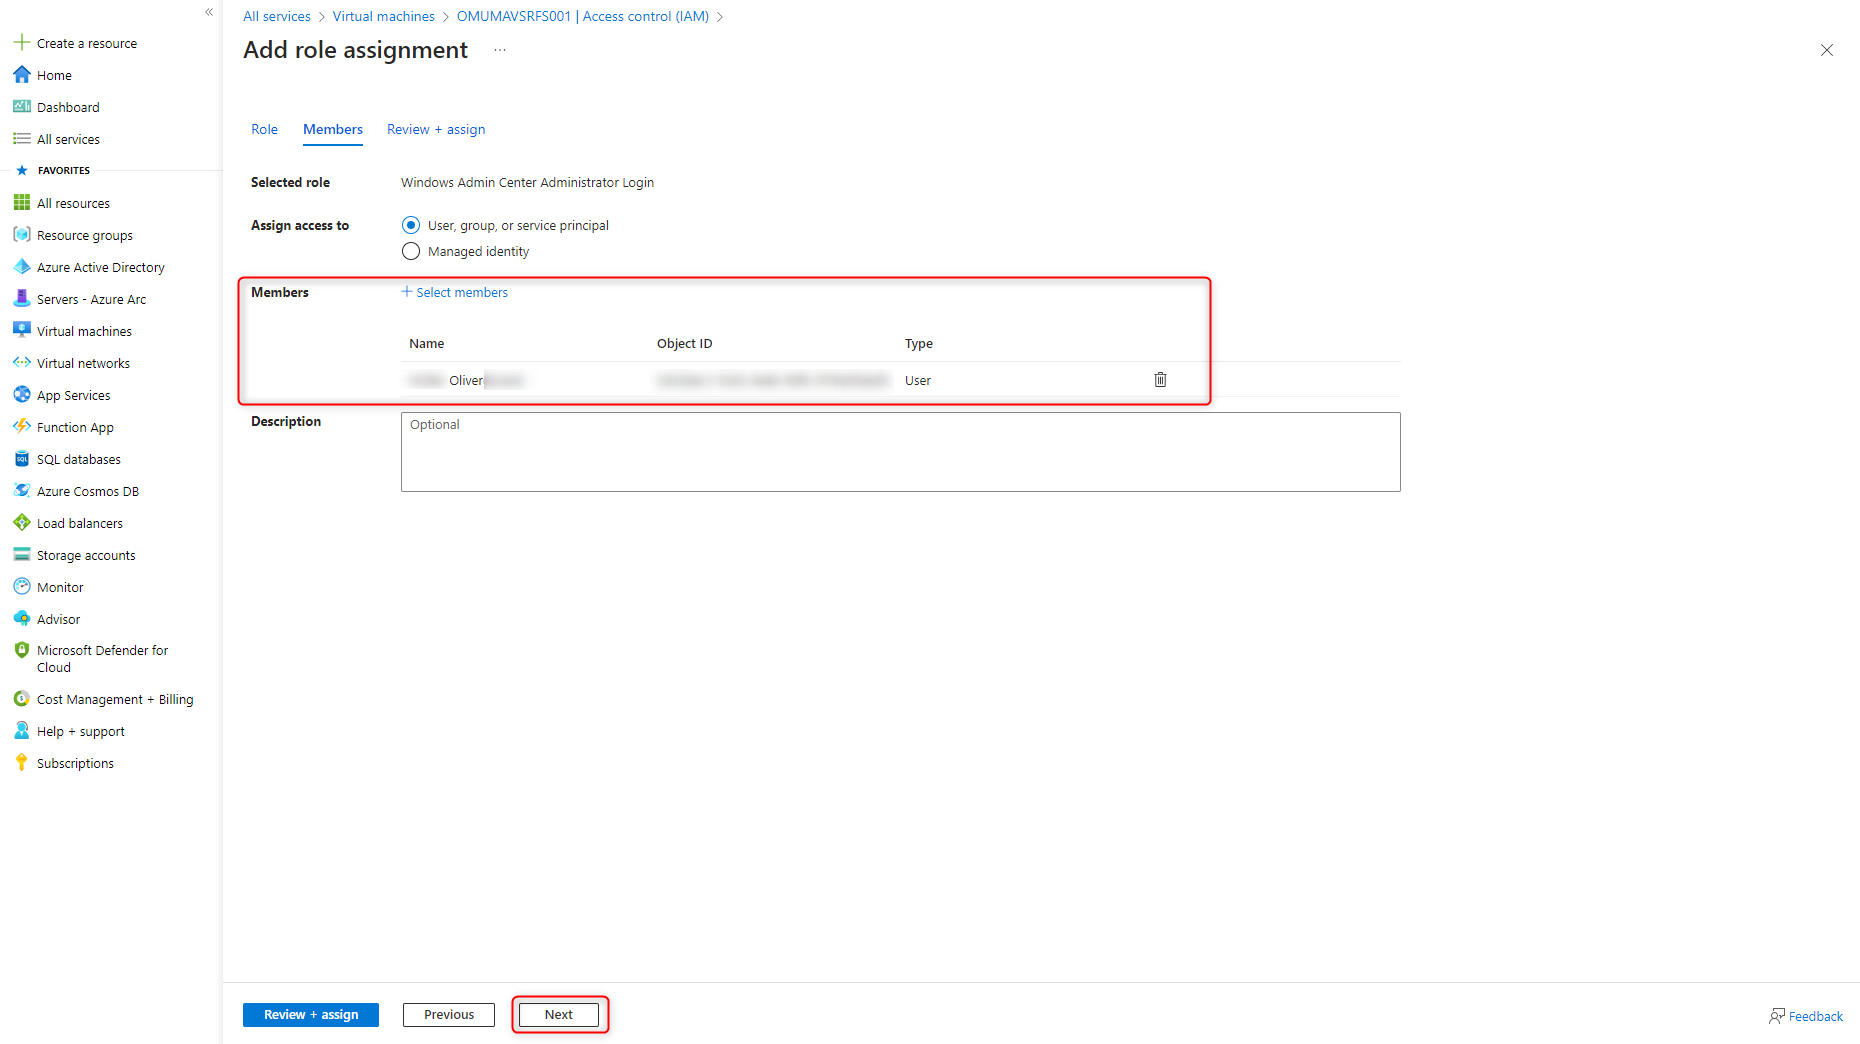
- Save configuration with Review + assign.
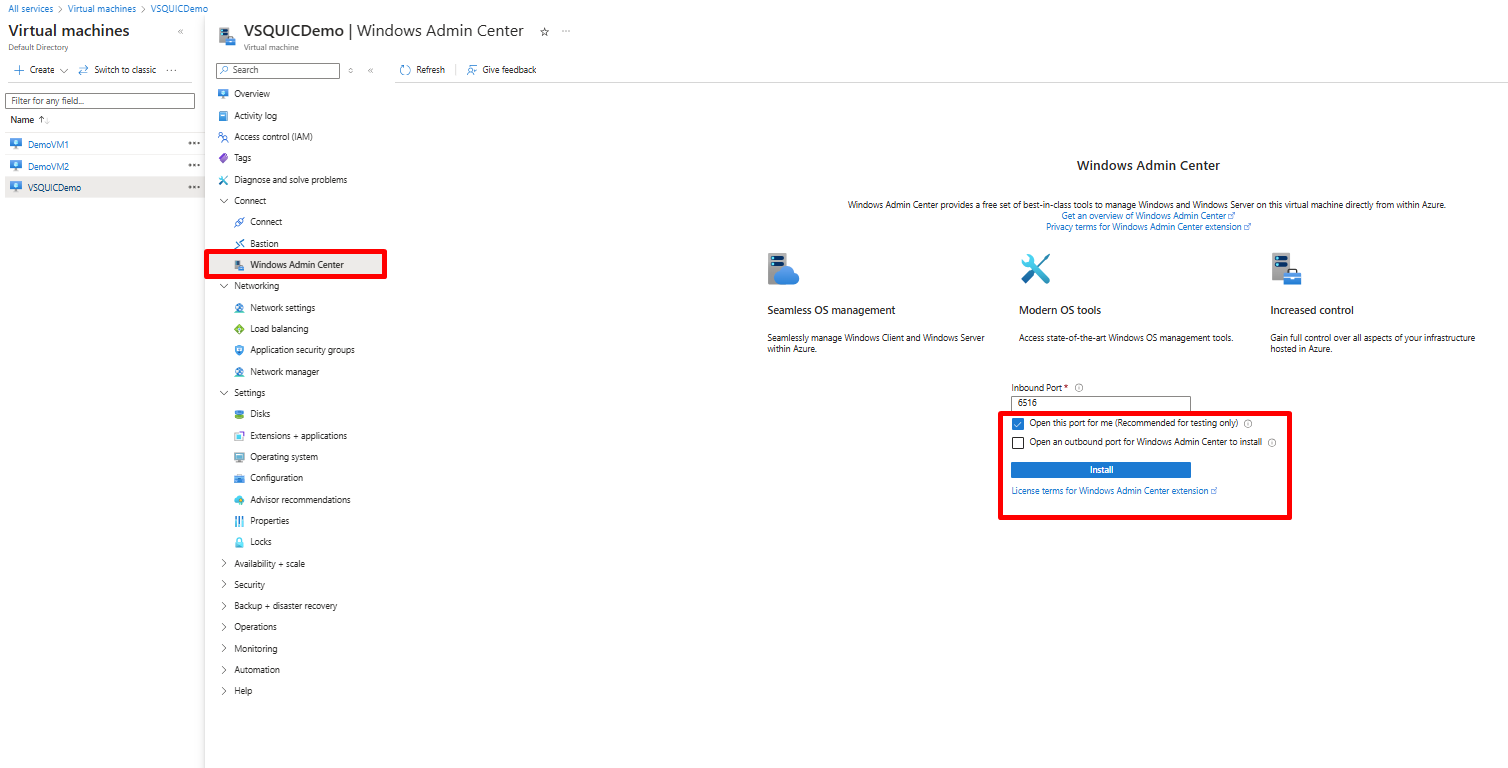
To install Windows Admin Center (WAC):
- Open the virtual server and click on Windows Admin Center under Settings.
- Click install. After a few minutes, WAC is ready.
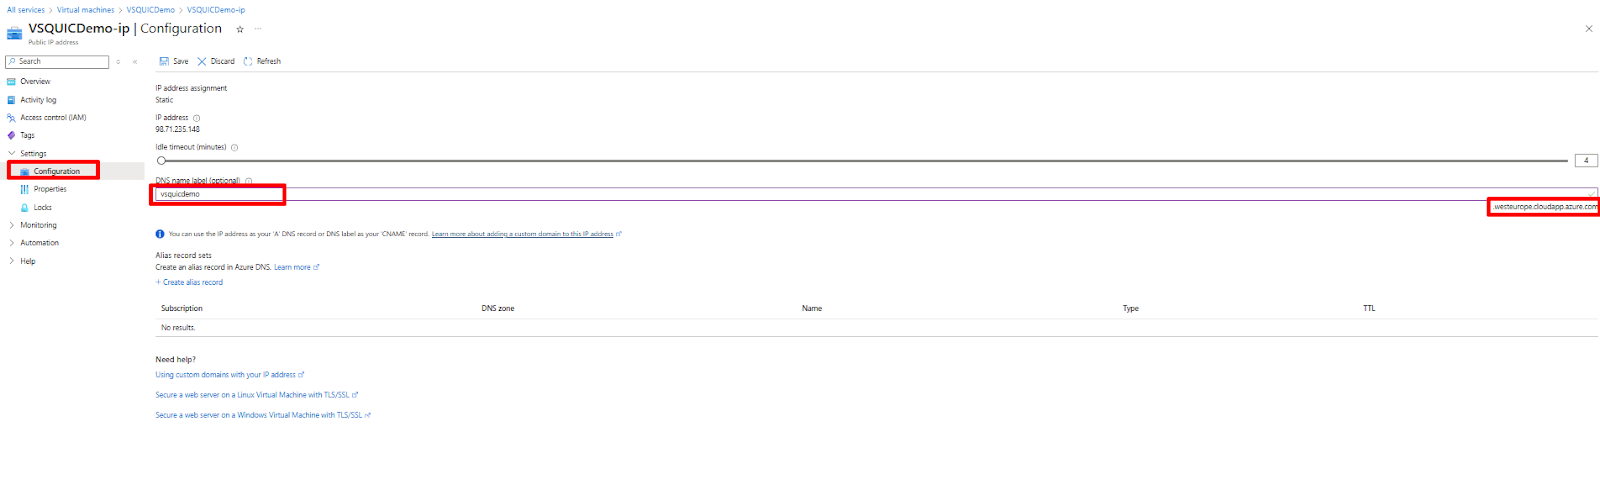
Step 3: Configure Public Access for the SMB Server
- Add a DNS Name Label in Azure
- In the Azure Portal, go to the Resource Group where the SMB server’s VM resides.
- Select the Public IP Address NIC.
- From the side menu, select Configuration and add a DNS Name Label to the IP address.
- This step enables external clients to connect to the QUIC server using a domain name.
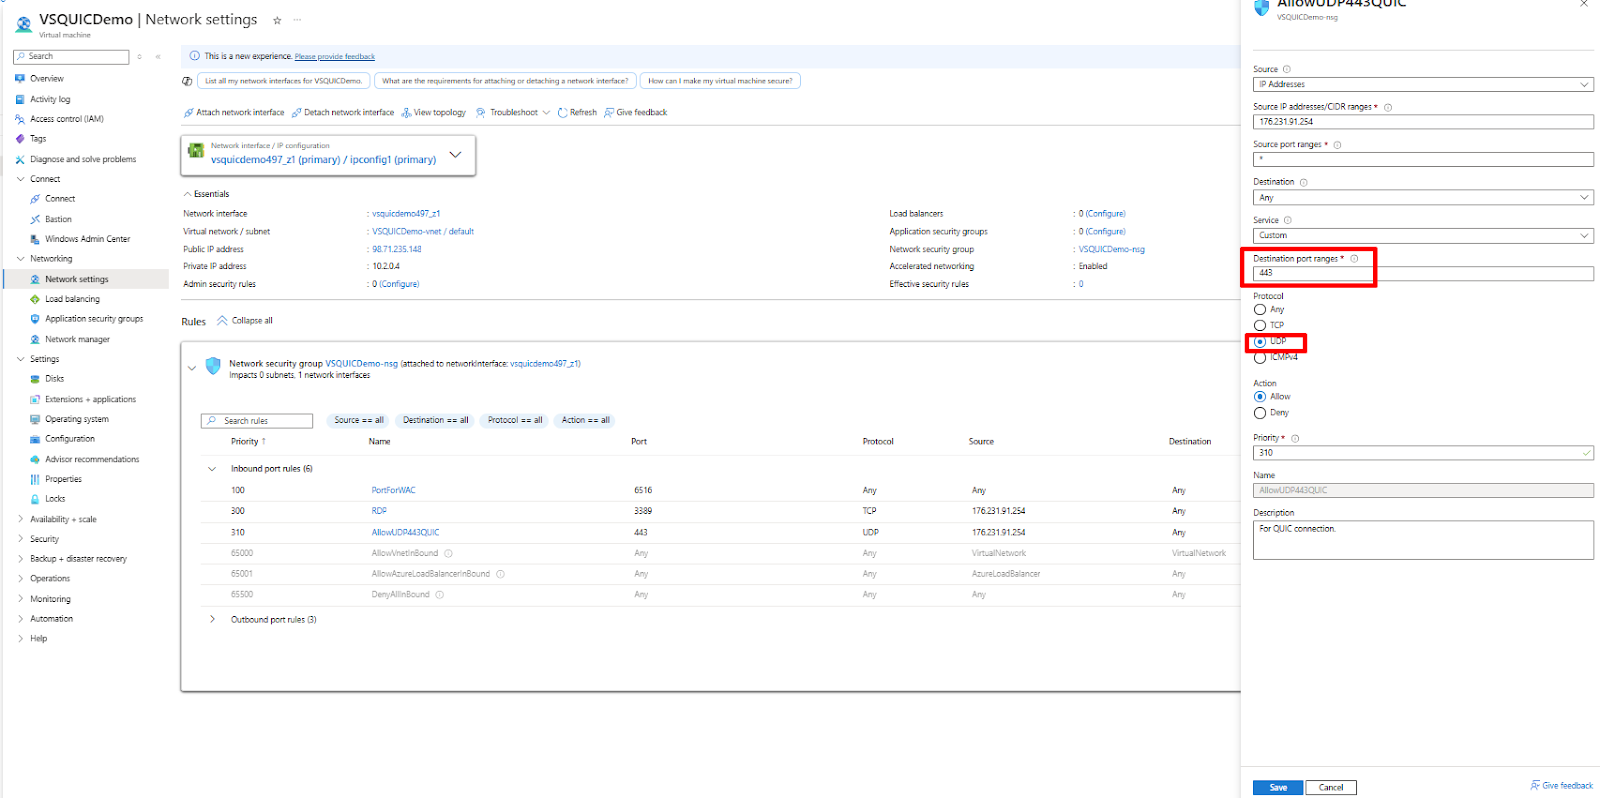
2. Open UDP Port 443:
- In the Azure Portal, return to the Resource Group and select the SMB server’s VM.
- Navigate to Networking and create an inbound security rule to allow UDP traffic on port 443 (SMB over QUIC protocol).
Step 4: Issue and Bind Server Certificate
To enable SMB over QUIC, install a certificate from a public Certificate from a trusted third party certificate authority such as DigiCert, GeoTrust, GoDaddy.
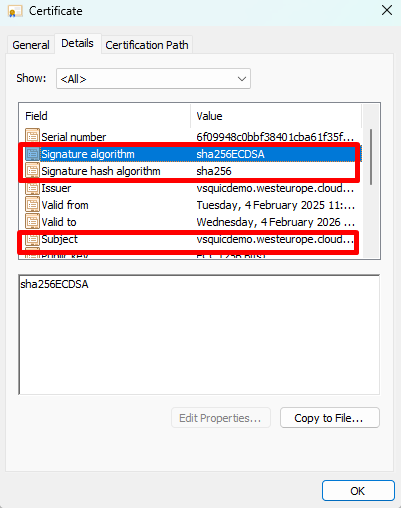
- Create a Certificate Authority-issued certificate with the following properties:
- Key usage: digital signaturePurpose: Server Authentication (EKU 1.3.6.1.5.5.7.3.1)
- Signature algorithm: SHA256RSA (or greater)
- Signature hash: SHA256 (or greater)
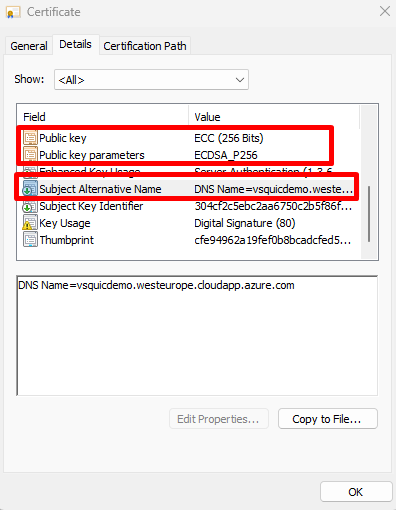
- Public key algorithm: ECDSA_P256 (or greater. Can also use RSA with at least 2048 length)
- Subject Alternative Name (SAN): (DNS label name configured in previous step and a DNS name entry for each fully qualified DNS name used to reach the SMB server)
- Subject: (CN= anything, but must exist)
- Private key included: yes
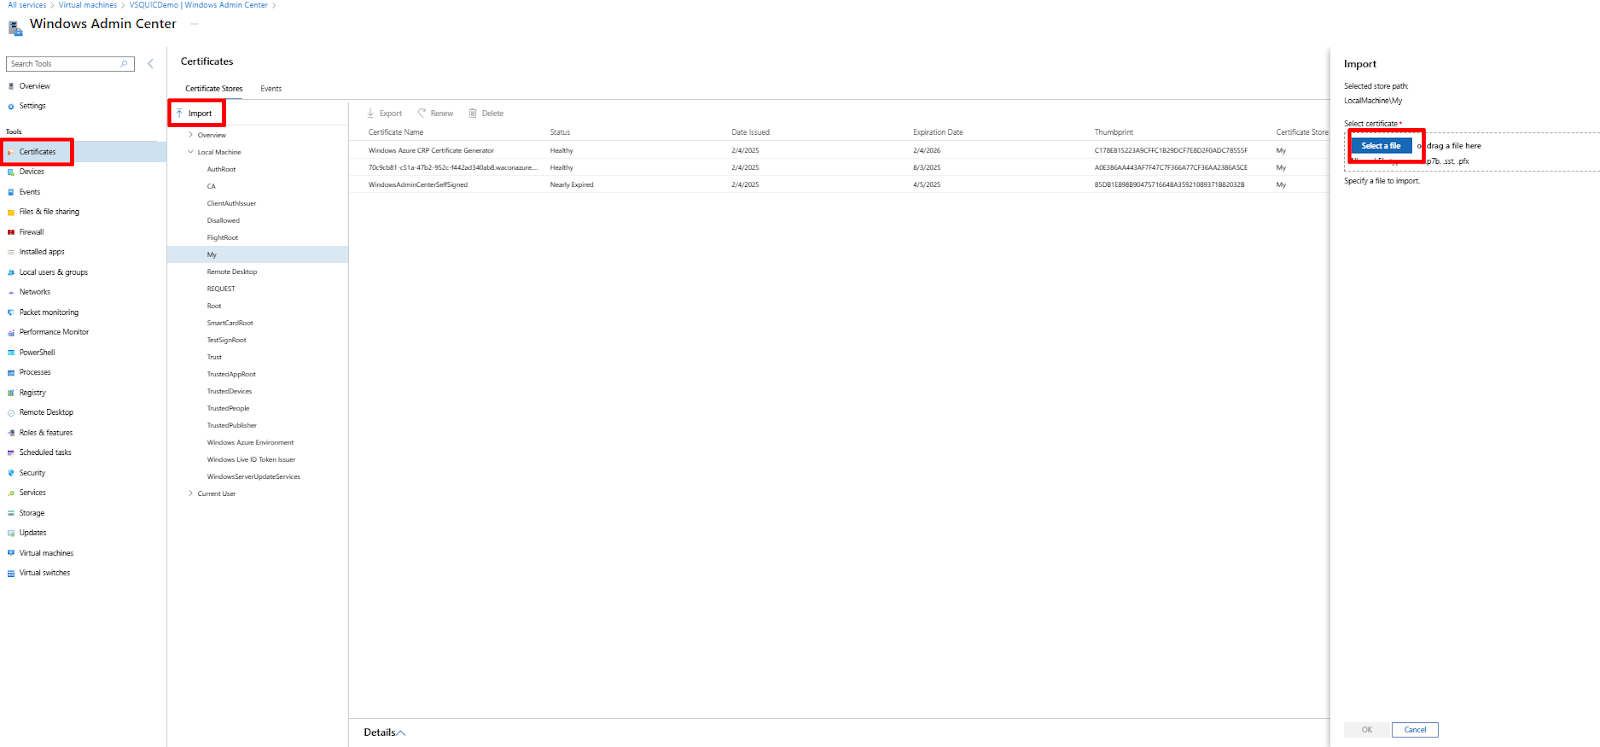
2. Install the certificate on the Azure Server under personal store.
- Open the virtual server and click on Windows Admin Center.
- Go to certificates -> Local Machine -> My
- Press import and select the public certificate created at the previous stage.
3. Enable SMB Over QUIC
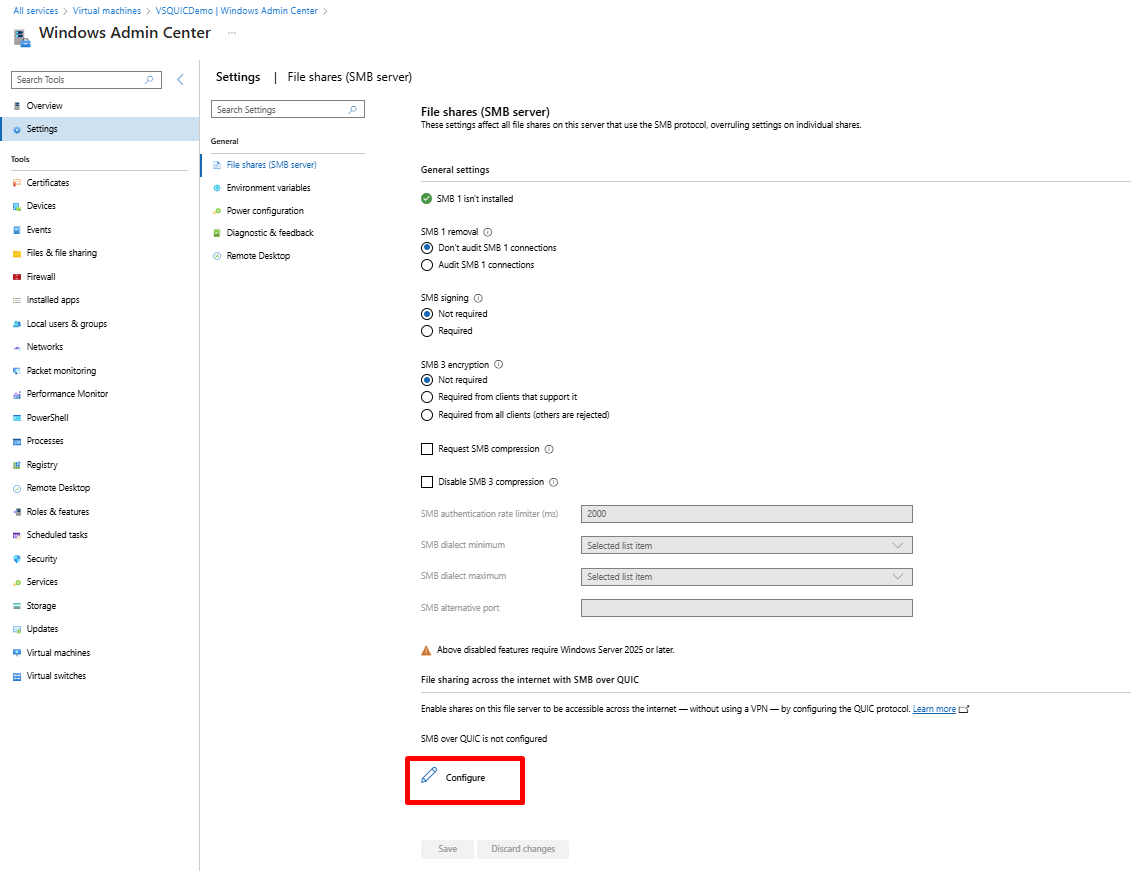
- Go to Windows Admin Center -> Settings -> File Shares
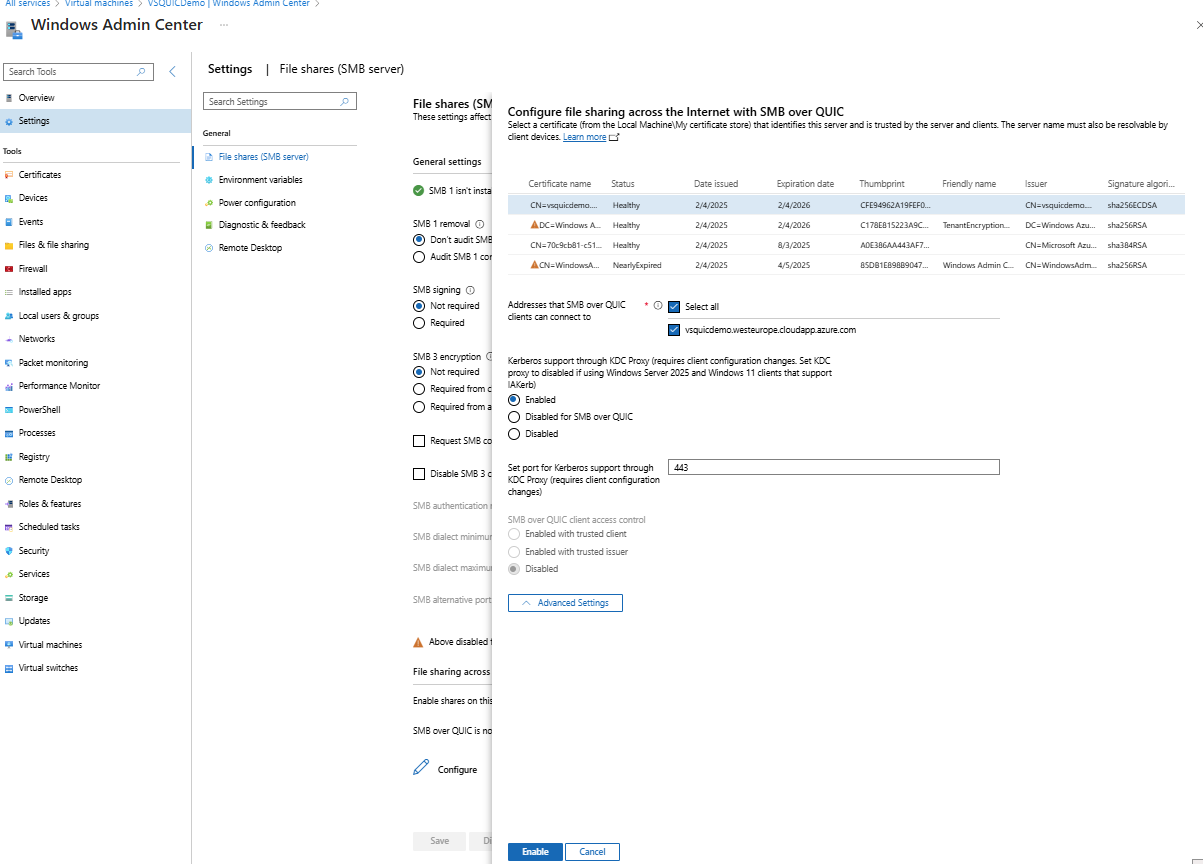
- Under “File sharing across the internet with SMB over QUIC” press Configure.
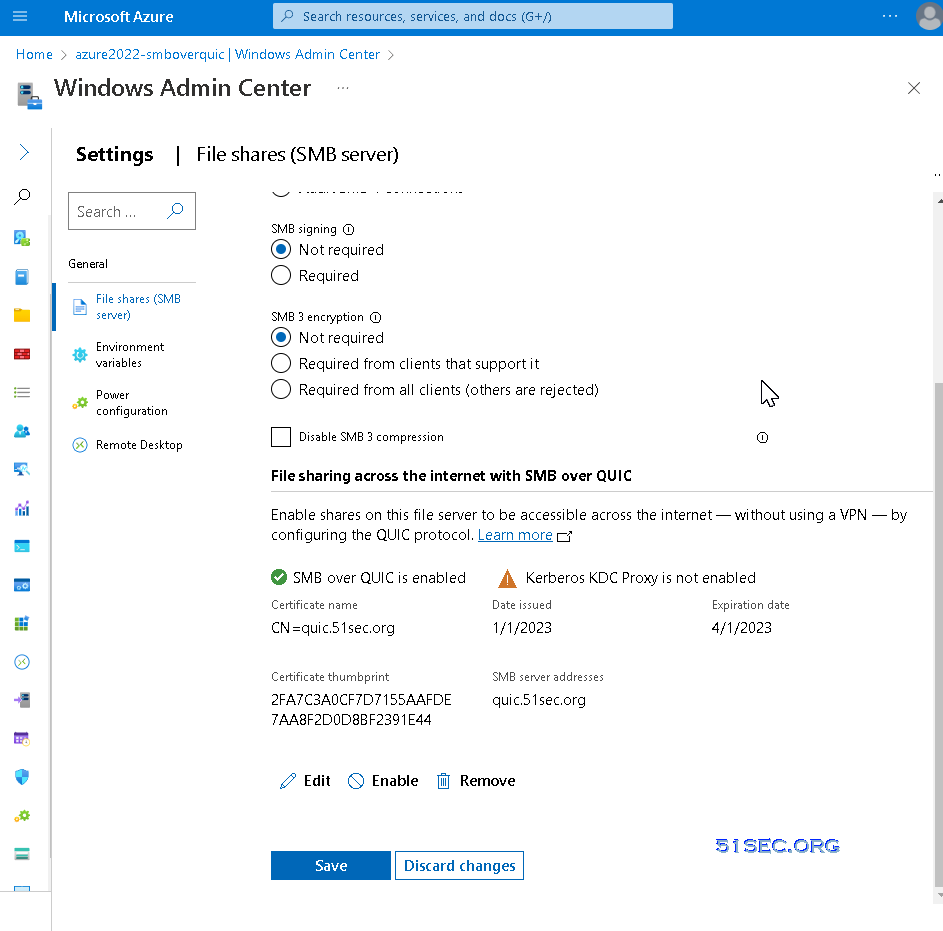
- Select the certificate we created at the first stage under “Select a computer certificate for this file server”, select the server addresses clients can connect to or select “Select all”, and select “Enable”.
Step 5: Create Share
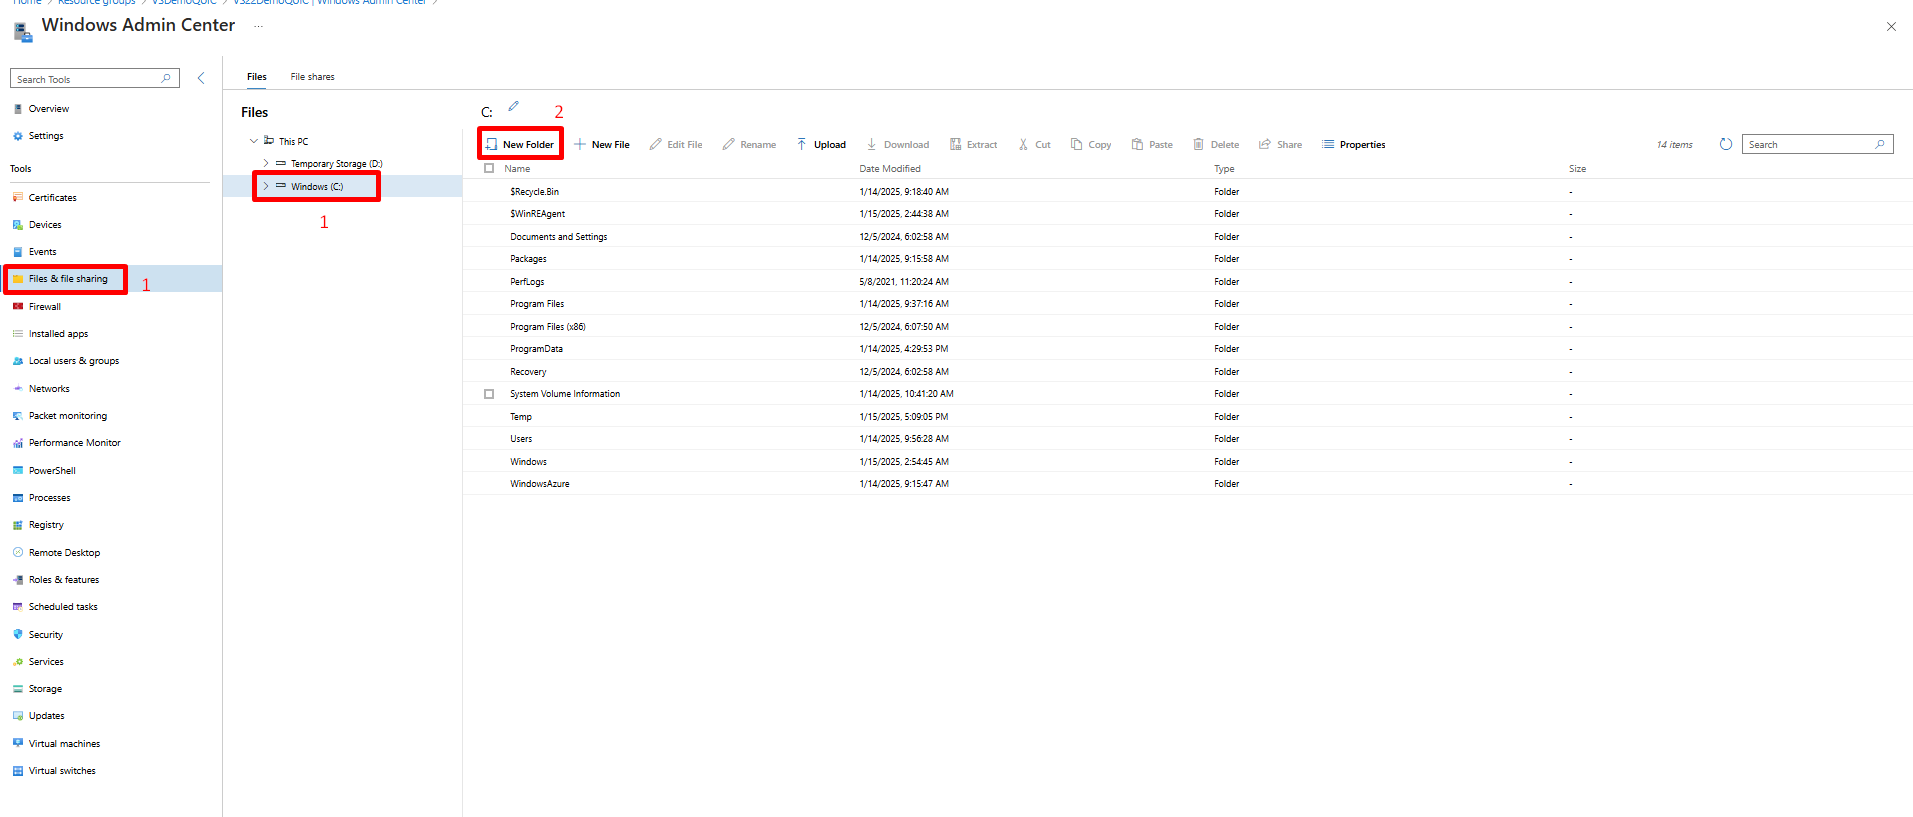
- Go to Windows Admin Center -> Files & file sharing and select C Drive from the side menu.
- Create a New Folder by pressing “New Folder” and give it any name.
3. Go to File shares tab and create New share.
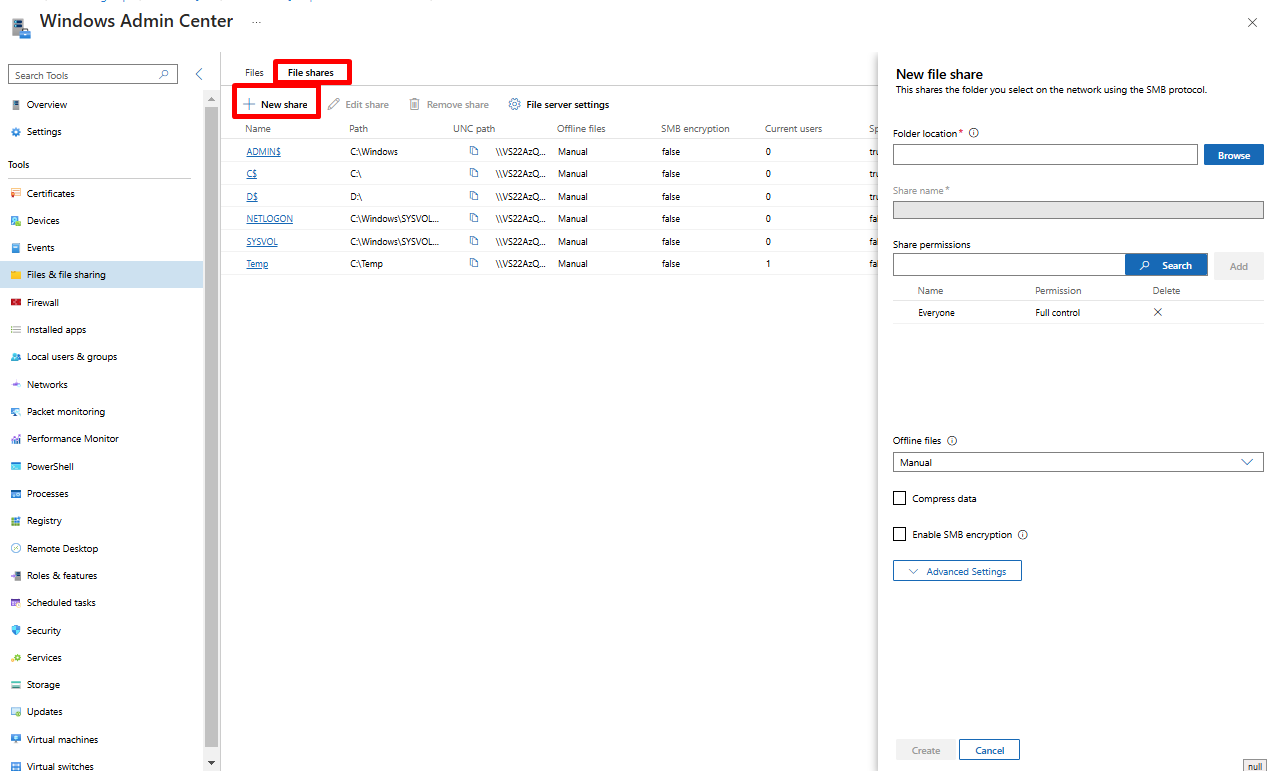
4. Click on Browse under Folder Location and select the folder created at the previous step.
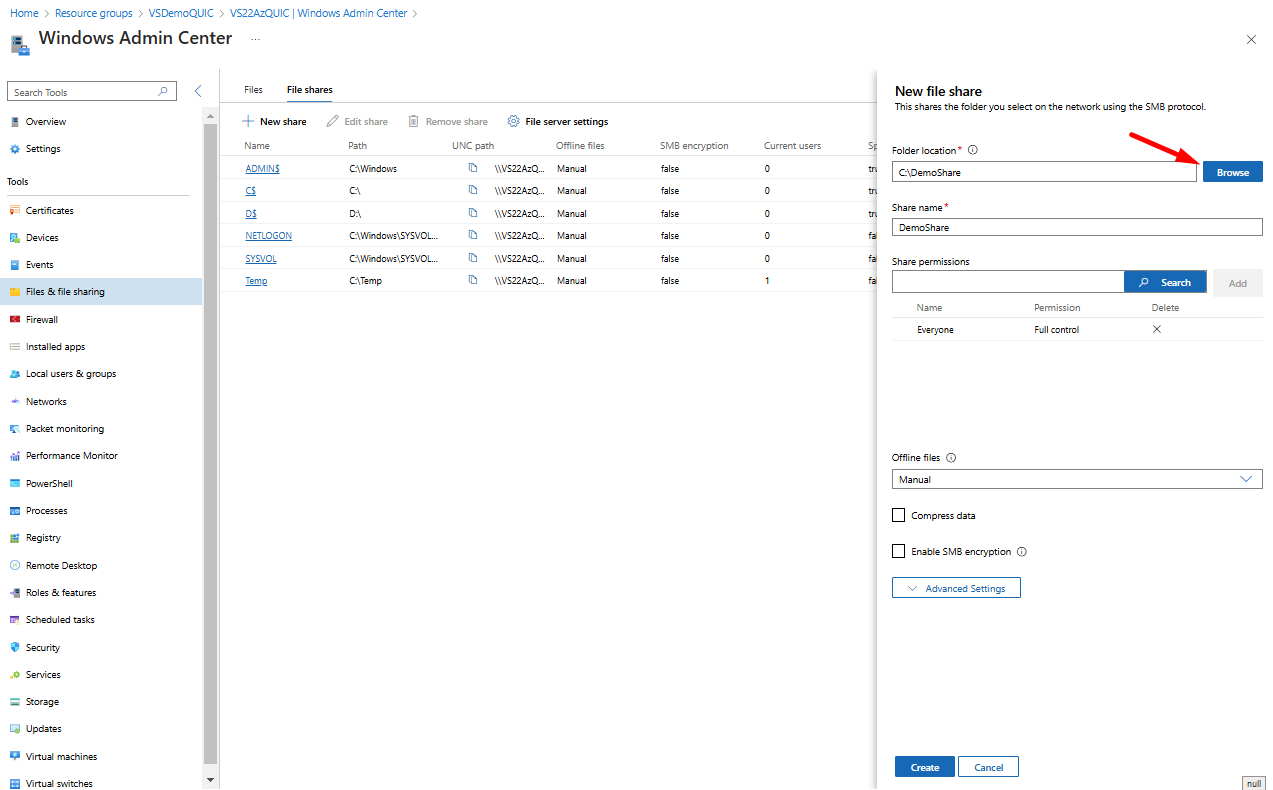
5. The default permissions on a share are Everyone Full control. If you wish to change them simply enter the username or group to which you want to grant access and press search under “Share permissions. Grant the User\Group the needed permissions by selecting it from the drop down list.
Step 6: Testing SMB Over QUIC
A network drive to a Windows file share can be mounted using SMB via QUIC with PowerShell, Command Prompt (CMD) or Windows Explorer. The prerequisite is that a file share is present on the Windows server and the client uses the Windows 11 operating system.
Map a Network Drive Using:
- PowerShell – open PowerShell on Windows 11 client and execute:
New-SmbMapping -LocalPath x: -RemotePath \\<AzureCloudVMDomain>\DemoShare -TransportType QUIC -Persistent $True -Username %username% -Password %password%
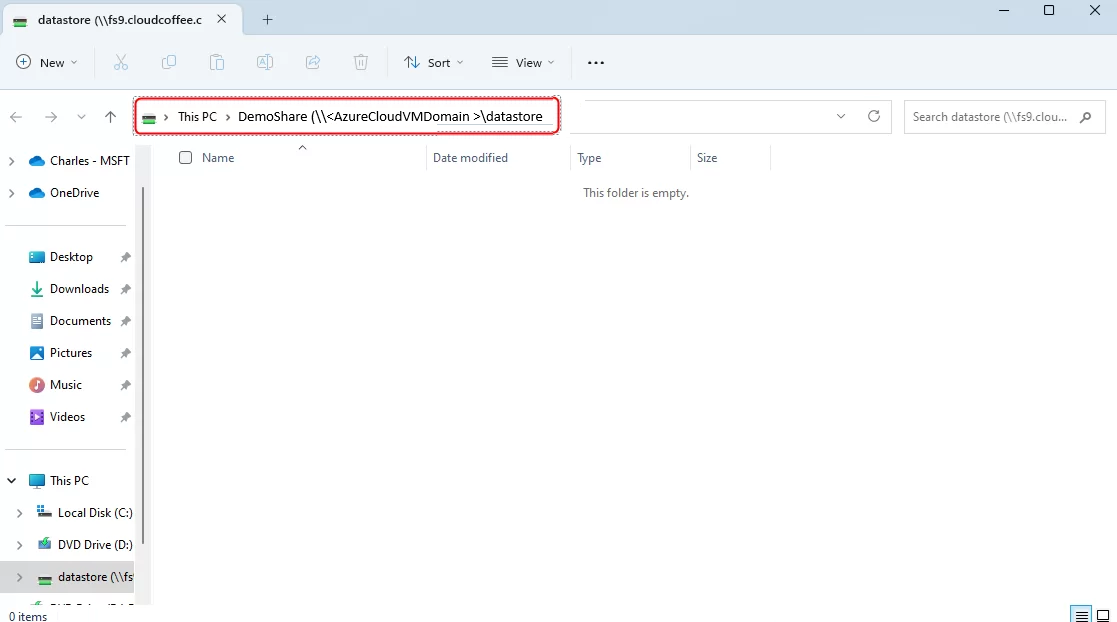
- CMD – open CMD on Windows 11 client and execute:
net use x: \\<AzureCloudVMDomain >\datastore /TRANSPORT:QUIC /PERSISTENT:YES /user:%username% %password%
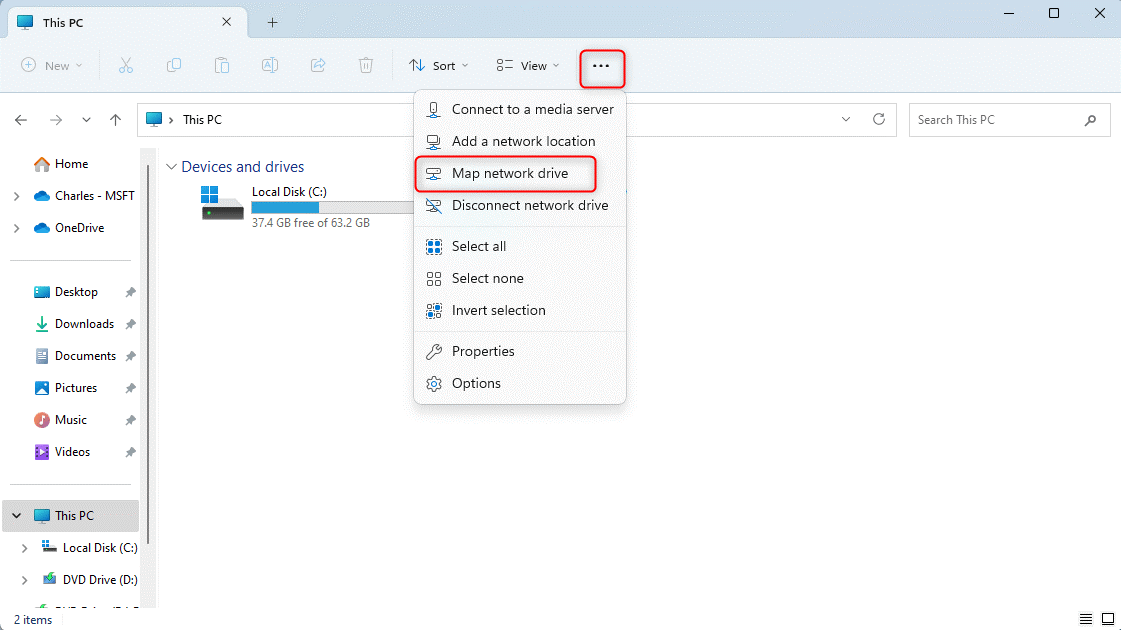
- Explorer – open Windows Explorer and select Map network drive.
- Enter drive letter, DNS address to the SMB over QUIC Share and select connection properties.
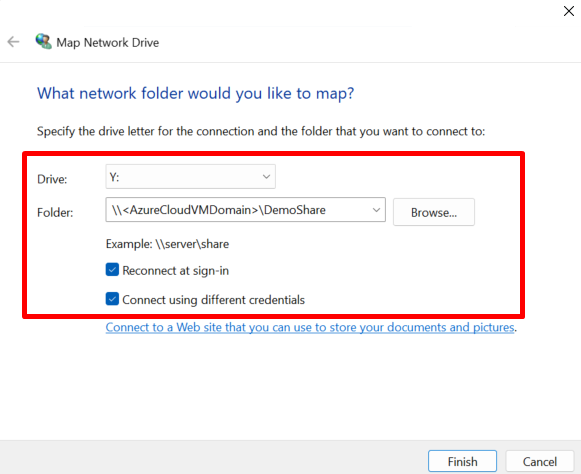
- After entering username and password, the network drive is connected to SMB over QUIC.
Conclusion
By following this guide, you can successfully configure and test SMB over QUIC, providing secure and reliable file access over untrusted networks. For production environments, ensure certificates are issued by a trusted Certificate Authority and DNS records are properly configured. With Visuality Systems’ jNQ and the QUIC add-on, you can extend SMB over QUIC to clients running different Windows versions, Linux, Android, or any Java-supported platform.
Want to know more? See some SMB Over QUIC Use Cases and Applications.
Any questions? Contact us and let Visuality Systems, the SMB protocol experts, help you.

Daniel Oz, IT Manager, Visuality Systems